Table Of Content
- Block printing: History, techniques, best supplies, and more
- Tour the largest all-in-one sublimation and analog textile printing company in the Western United States
- Trending Articles
- Step 1: Choose Your Quilt-Inspired Block Printing Design
- Step 5: Prepare Blockprinting Materials
- Reduction block printing
This is a broad category that includes many specific techniques. In Europe, these are frequently called woodcut prints. As artists and craftspeople ourselves, we’ve always sought to support highly specialized artforms and their histories.
Block printing: History, techniques, best supplies, and more
My next project using these block stamps is a wall design in my pantry. After printing is finished, the fabric is washed and hung to dry in the sun. First, dyes are made using traditional methods and recipes. Because the dyes are often natural, slight variations may occur, further adding character to these designs. Every time you make a print remember to re-load your lino with more paint, this is important to achieve a nice crisp print each time.
Tour the largest all-in-one sublimation and analog textile printing company in the Western United States
It's a great way to express your creativity and add a personal touch to your home or wardrobe. There are typically several pattern blocks used, and since it’s done by hand the images never line up perfectly. This is one of the main ways to distinguish hand-block printed fabric from screen/digitally printed alternatives.
Trending Articles
I used a hot iron with steam to get all the creases out. Once your own fabric is nice and pressed, place it flat on your covered work surface. Cutting a stencil, or pattern, from a material like paper or plastic is the first step in the stencil printing process.
Step 1: Choose Your Quilt-Inspired Block Printing Design
Explore the art of block print in our spring collection, and find inspiration to weave its pattern into your home. One of my favorite ways to spice up my block printing is by layering prints. Layering produces a depth and a uniqueness that you just can’t get with a single layer of prints.
Step 5: Prepare Blockprinting Materials
Female trailblazers of block-printed design – in pictures - The Guardian
Female trailblazers of block-printed design – in pictures.
Posted: Sat, 11 Nov 2023 08:00:00 GMT [source]
Then press the inked design face down firmly and evenly onto fabric or paper. Also be aware of fingers that are holding the linoleum block in place opposite the tool. And it can also be used to cut away excess material from the side of the block to make it easier to handle while stamping. This will ensure the ink from the marker doesn’t come off onto your fabric or paper while printing. Block printing was one of my favorite techniques to experiment with in my printmaking classes in college. But it took some getting used to before I felt really comfortable and confident in what I could create with this new skill.
SZ Blockprints Keeps the Legacy of the “Godmother of Block Printing” Alive - PRINT Magazine
SZ Blockprints Keeps the Legacy of the “Godmother of Block Printing” Alive.
Posted: Fri, 16 Feb 2024 08:00:00 GMT [source]
Step 3: Start carving the linoleum block.
Our lighting collection of colourful ceramic lamp bases and luxury silk lampshades are the perfect pieces to mix and match in your space. From quirky contemporary shade styles to traditional versatile designs, discover wonderful accessories to light up any room. Explore our latest fabric capsule collection featuring a diverse mix of floral motifs inspired by antique textiles from Turkey, India and England. Crafted from a contemporary palette of nature-inspired hues including serene blues, vibrant greens, soft magenta and rich browns, this collection perfectly captures the essence of springtime. If you have a block made of thin grey Hessian-backed linoleum, use a large spoon to help press down the block. Consider the areas you would like to be colored with ink, or left as negative space (where there is no color).
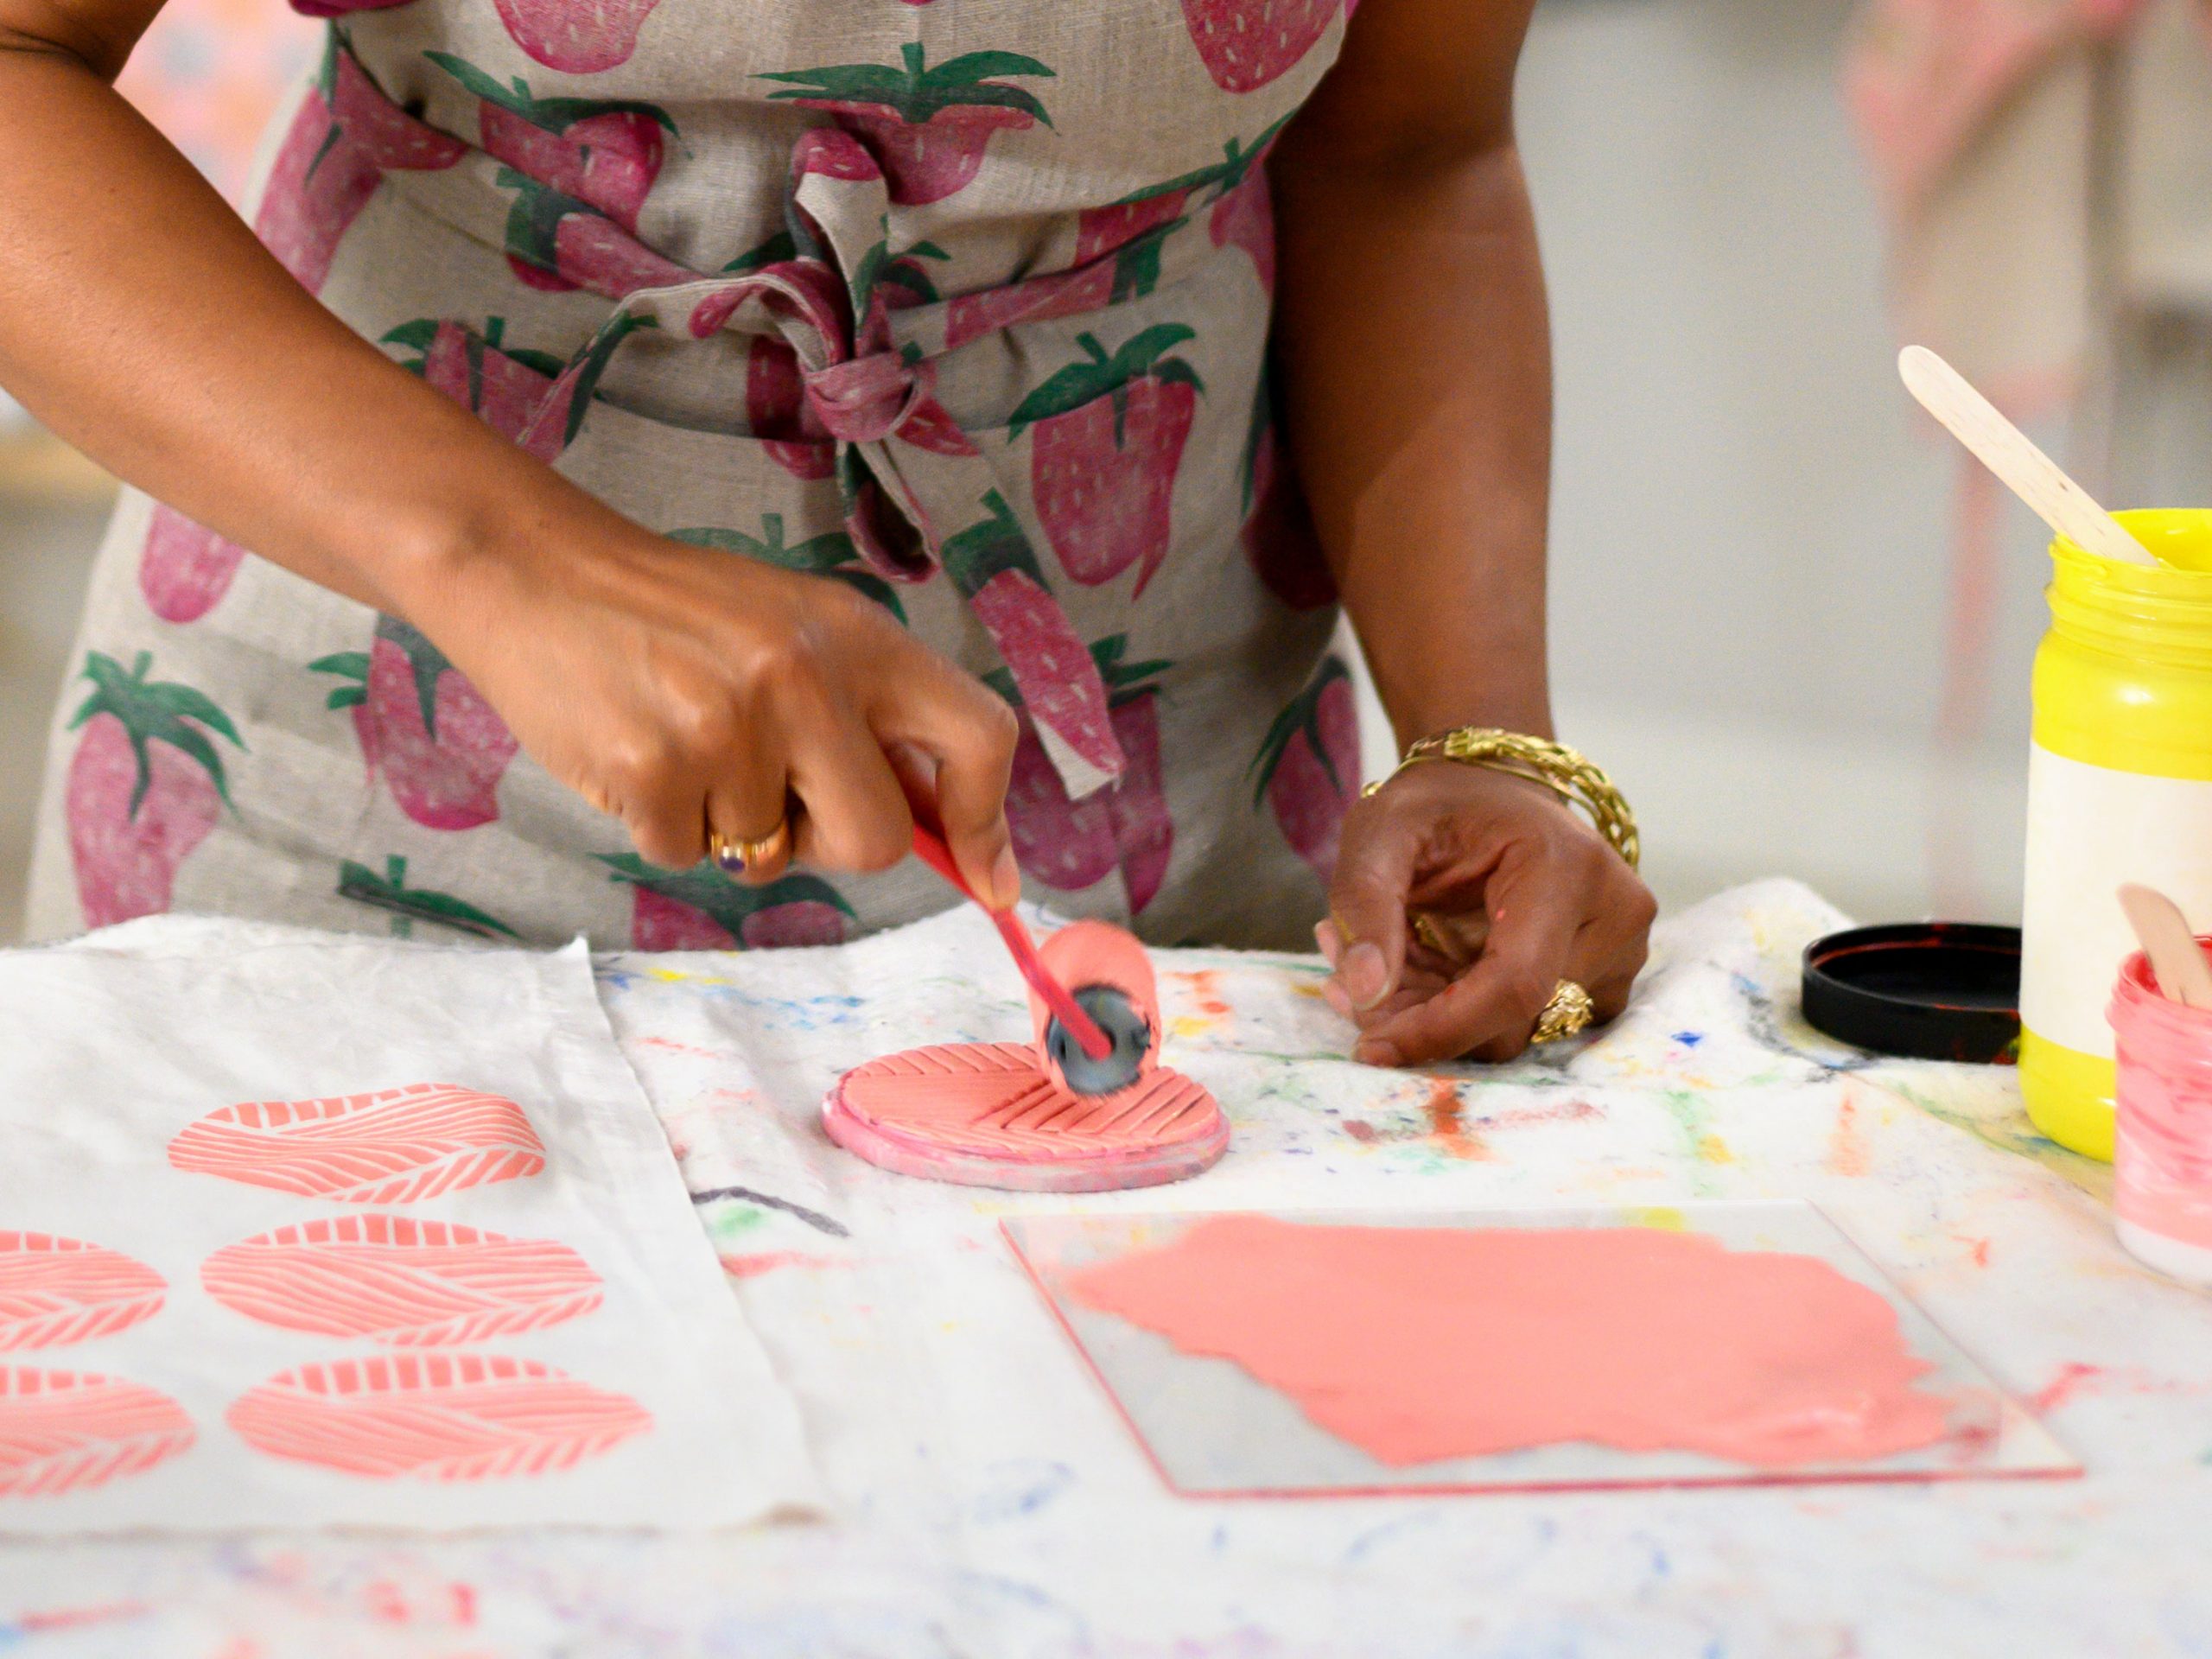
Next, place about a tablespoon of paint on the glass and begin rolling it with the foam brayer. Cover the whole brayer until your face covers everything. As far as the different brands of inks, I haven’t found too many bad ones. Your higher end brands will often be the best quality, so you get what you pay for in this scenario. More expensive inks usually will be made with more pigment, they’ll be thicker and more vibrant. Printing on fabric is my absolute favorite way to create.
Reduction block printing
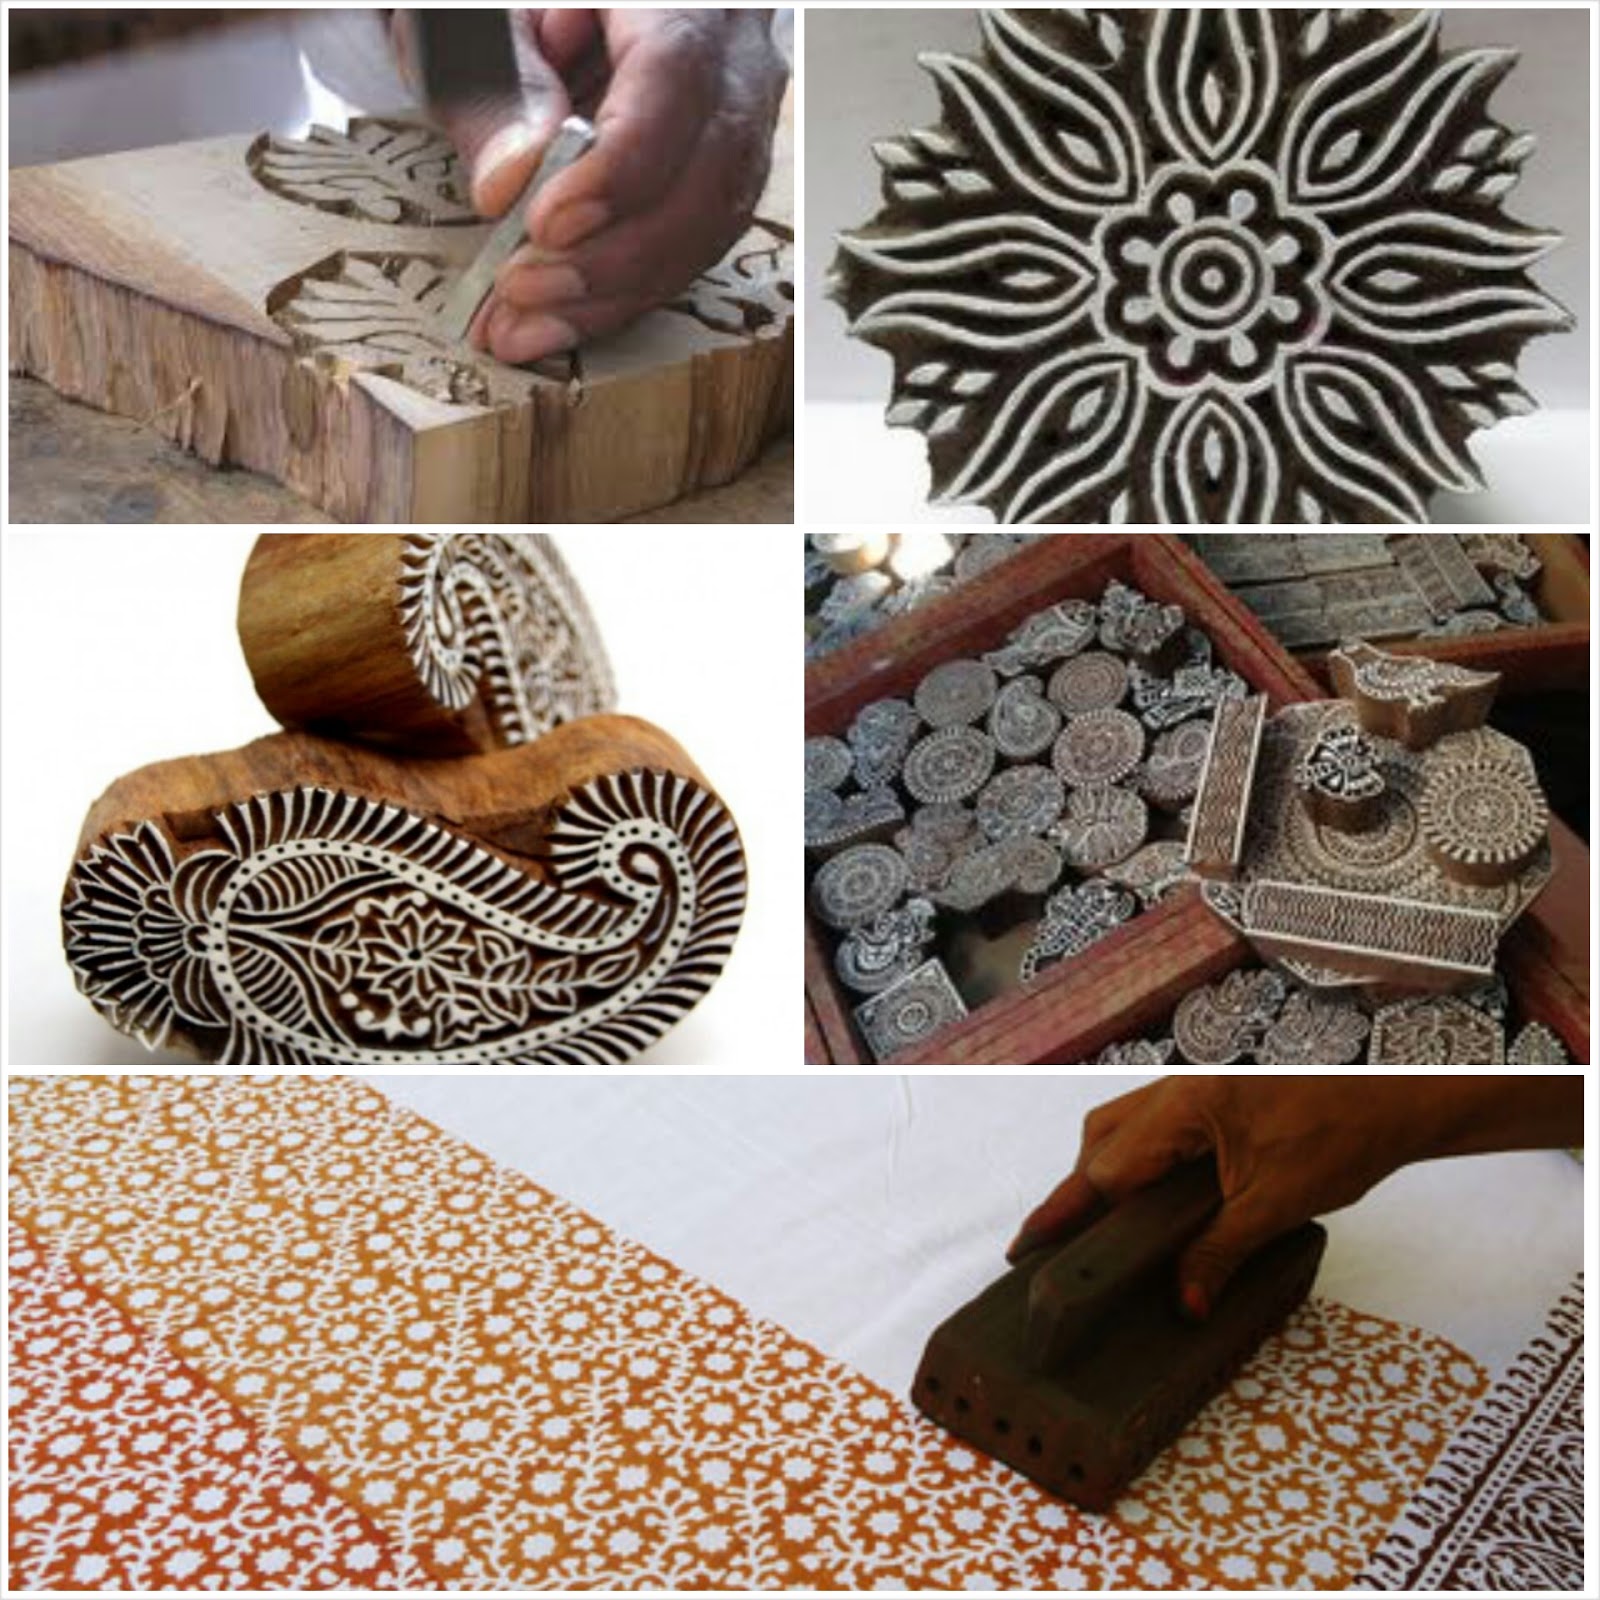
The first step for block printing is coming up with a design. It wasn’t until hundreds of years later when it was eventually adapted to paper, which is now probably the most widely used material for block printing. Initially, block printing fabric was the norm – most often being printed onto silk cloths. It’s easier to carve than wood, making the whole process generally faster and smoother for the artist. Linocut has been particularly popular since the end of the Victorian era, and has been used widely throughout continental Europe and America. See the bonus information further down the post about printing with objects that you can find around your house.
Block printing on fabric is easy and fun and makes a great creative activity for all the family. Fabric designer and block printing enthusiast Molly Mahon fell in love with the process when visiting India. As well as her own fabric and wallpaper collections she now runs workshops and tutorials on how to block print at home and has shared a simple step by step guide to follow. Pressing the fabric is a great starting point for your block printing project. This step is important because you need a nice flat surface of fabric to press the blocks onto.
The second stamp comes out lighter which gives it a worn vintage look in different places throughout the towel. Now roll the paint on the brayer onto the pattern on the wooden block stamp. Keep rolling until you cover all the fine details of the design. Just when you think you have it all covered use another fabric to test it. If you're like me and love homemade and vintage, you're in for a treat today.


No comments:
Post a Comment